If the installation didn’t go smoothly for you, here are some additional tips that might help.
Latest Press Release
Latest Press Release
How To
If you already have a Zubie account configured, you can go straight to the interactive tour. Otherwise, please click “Set Up Your Account” below.
Step 1

Step 2
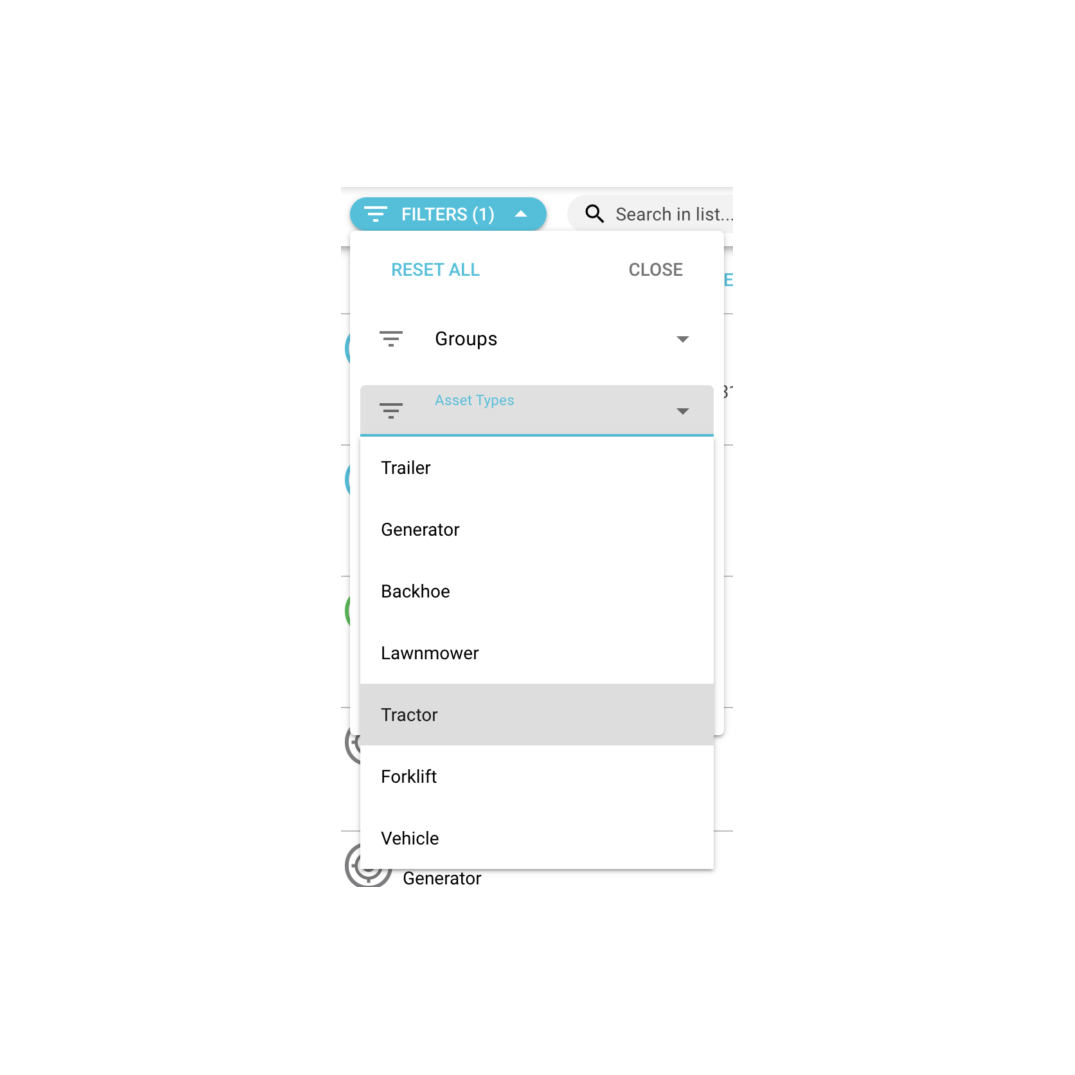
Now that your asset is connected, you will be able to see it on the Live Map along with your vehicles (including vehicles with dashcams). For easy search and sorting, use the “Filter” button that sits right under the Zubie logo in the application. From “Filter,” you can click on “Asset Types” to have the map display on the specific asset categories that you choose. Note that you can choose more than one asset type at a time, and that “Vehicle” also counts as an asset type.
Clicking on an asset will bring up a small information bubble. The options “Overview” and “Location” will appear at the bottom of that bubble; clicking them will provide you with additional detail. The “Overview” screen should be familiar to you since it contains much of the same information as a vehicle overview.
Try the Interactive Tour
Need more help?
If the installation didn’t go smoothly for you, here are some additional tips that might help.
Your asset track device comes in two parts – a magnetic bracket (which can also be affixed using screws) along with the device itself. For everyday use, the device clips into the bracket. To charge the tracker, first remove it from the bracket. If you don’t remove the device from the magnetic bracket, you may damage both the unit and your charger.
There is no charging port for the device. You will need to use a wireless charging pad that supports Qi wireless charging. Wireless chargers can be obtained from any major retailer and should cost $10-15. Virtually all of them support Qi inductive charging.
First, ensure that you have created an asset in the Zubie web application to associate with the device. Until there is a pairing of device and asset, no location will display.
If you have created your asset in the application, first try to force the device to send a location update. Hold down the button for approximately 5 seconds (the light should blink).
If you are still not receiving a signal, try the following:
You should be able to see low battery notifications in two places:
The standard setting for device updates is once every 6 hours (4 times per day). This can be adjusted to a maximum frequency of once per hour, or reduced as low as a once per day – please contact support@zubie.com to request an adjustment for your devices.
Note that increasing the “ping” frequency will cause the battery to drain faster. At the standard setting, your device’s battery should last 12-15 months between charges. At its lowest setting (once per day), the battery can last up to 2 years. At its highest setting (currently once per hour), the device’s battery will drain in 2-3 months.
If you are unable to use the magnetic mount to attach the device, you can permanently affix the bracket by using the screw holes in the magnetic mounting plate. Note that you should affix only the bracket. The device cannot be recharged except by a wireless charging pad – there is no charging port – so only the bracket should be permanently mounted.